Help Center
Firston Sight Walkthrough
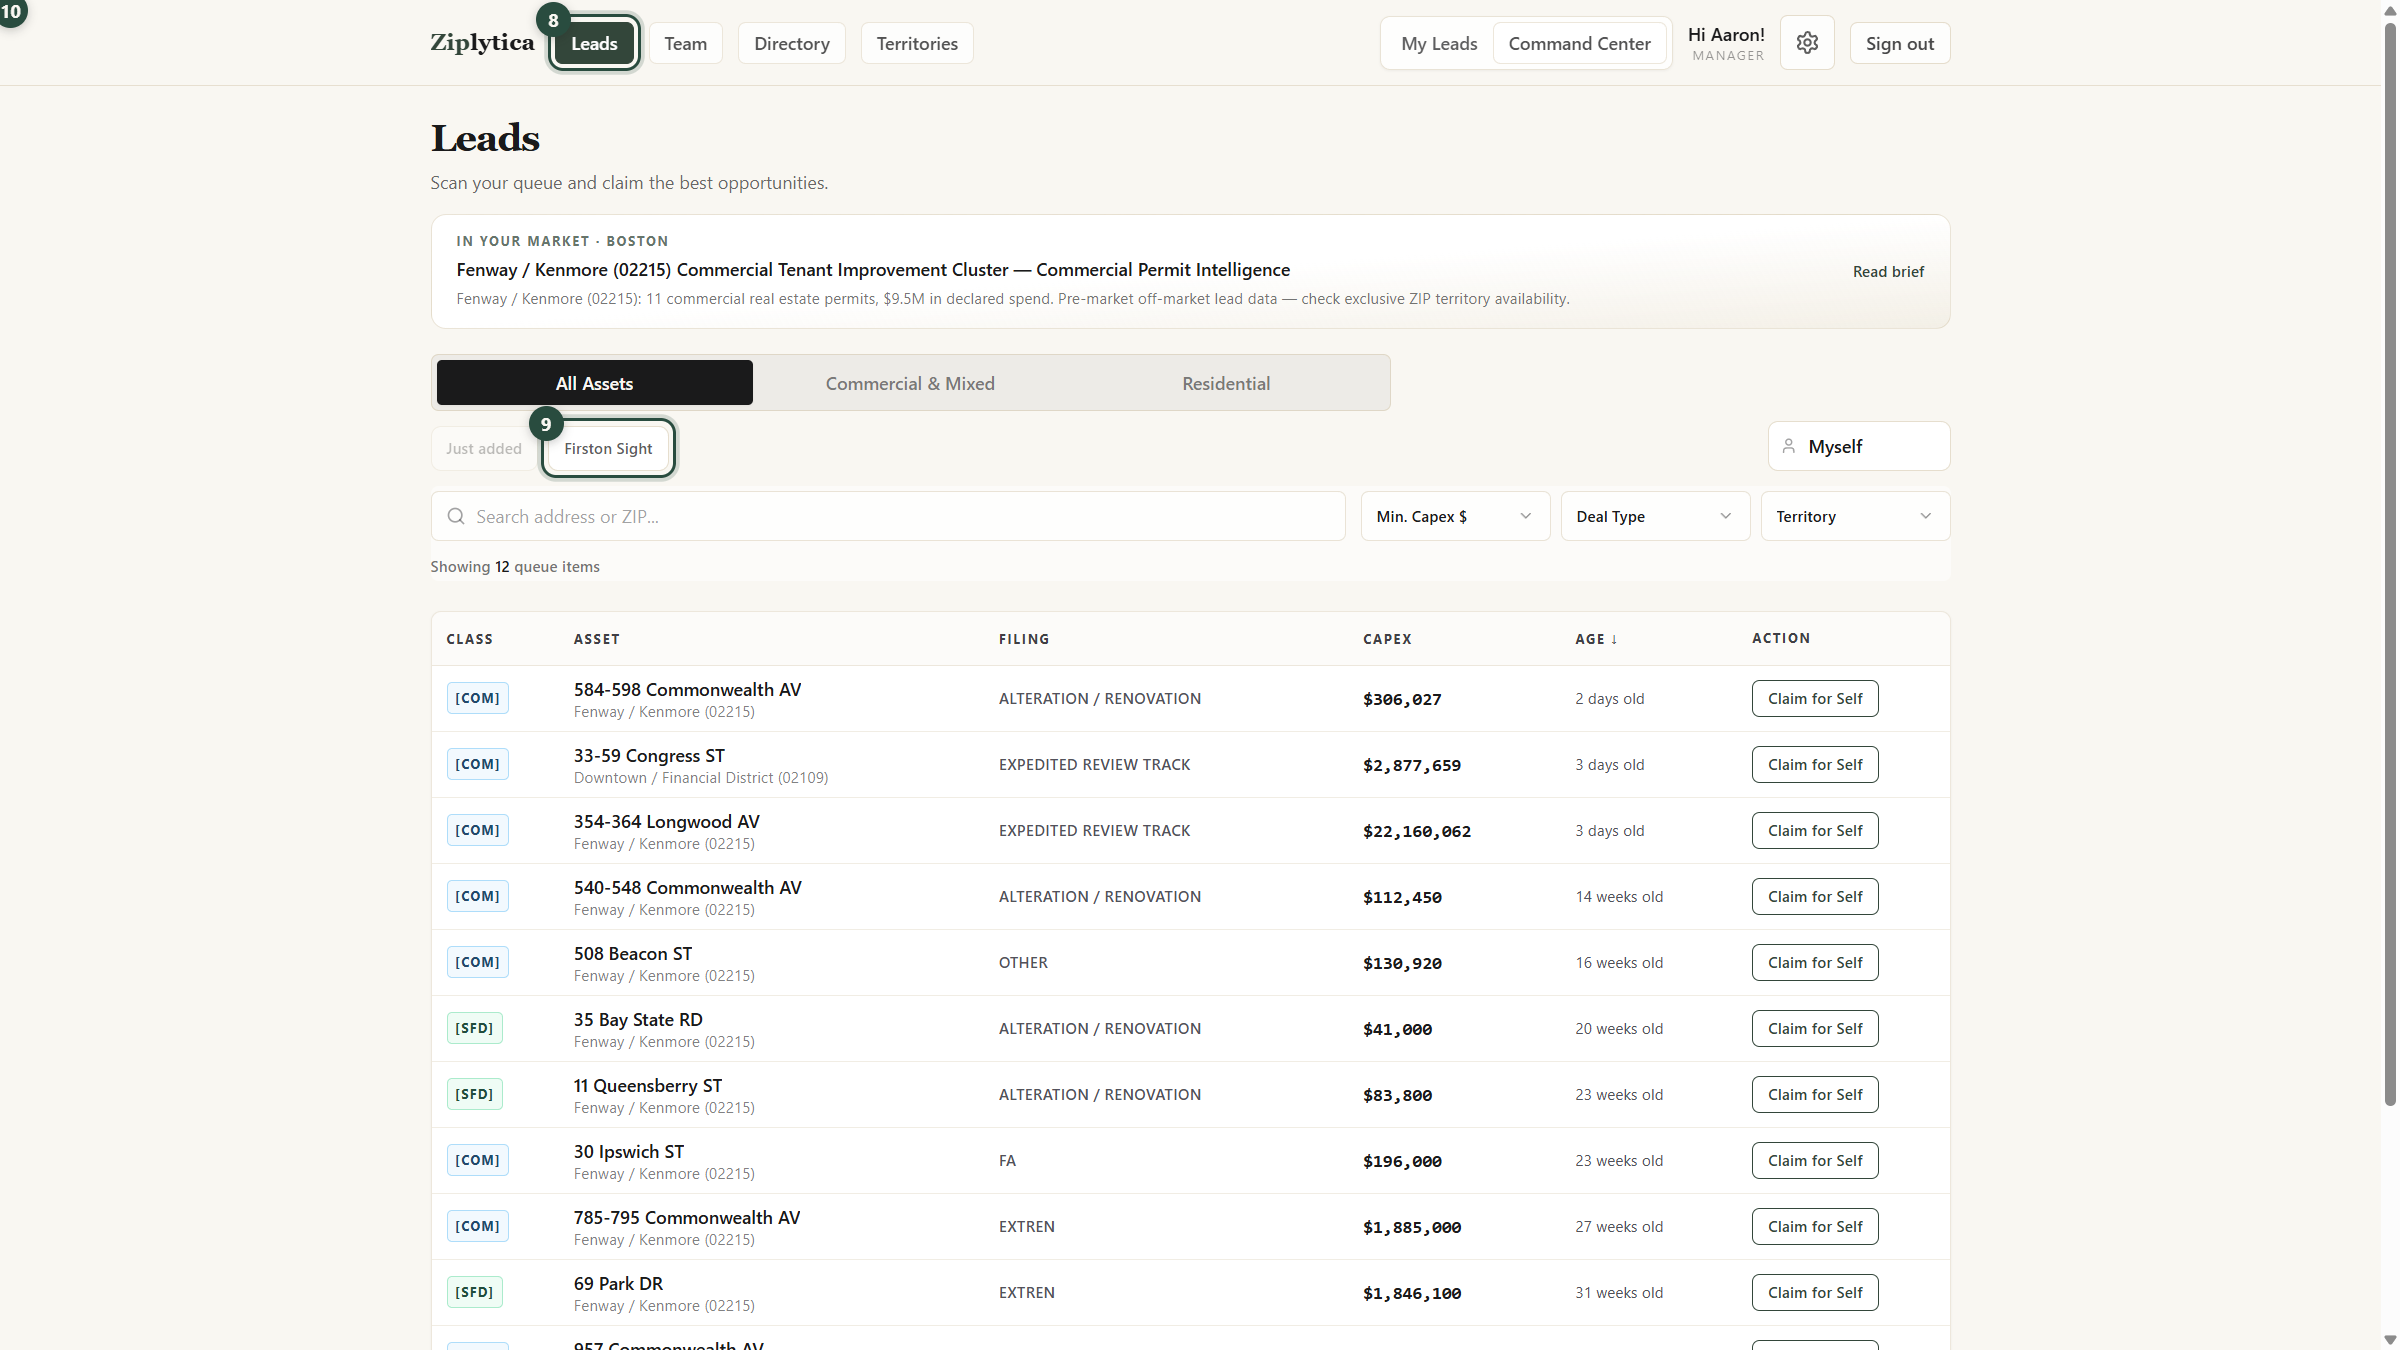
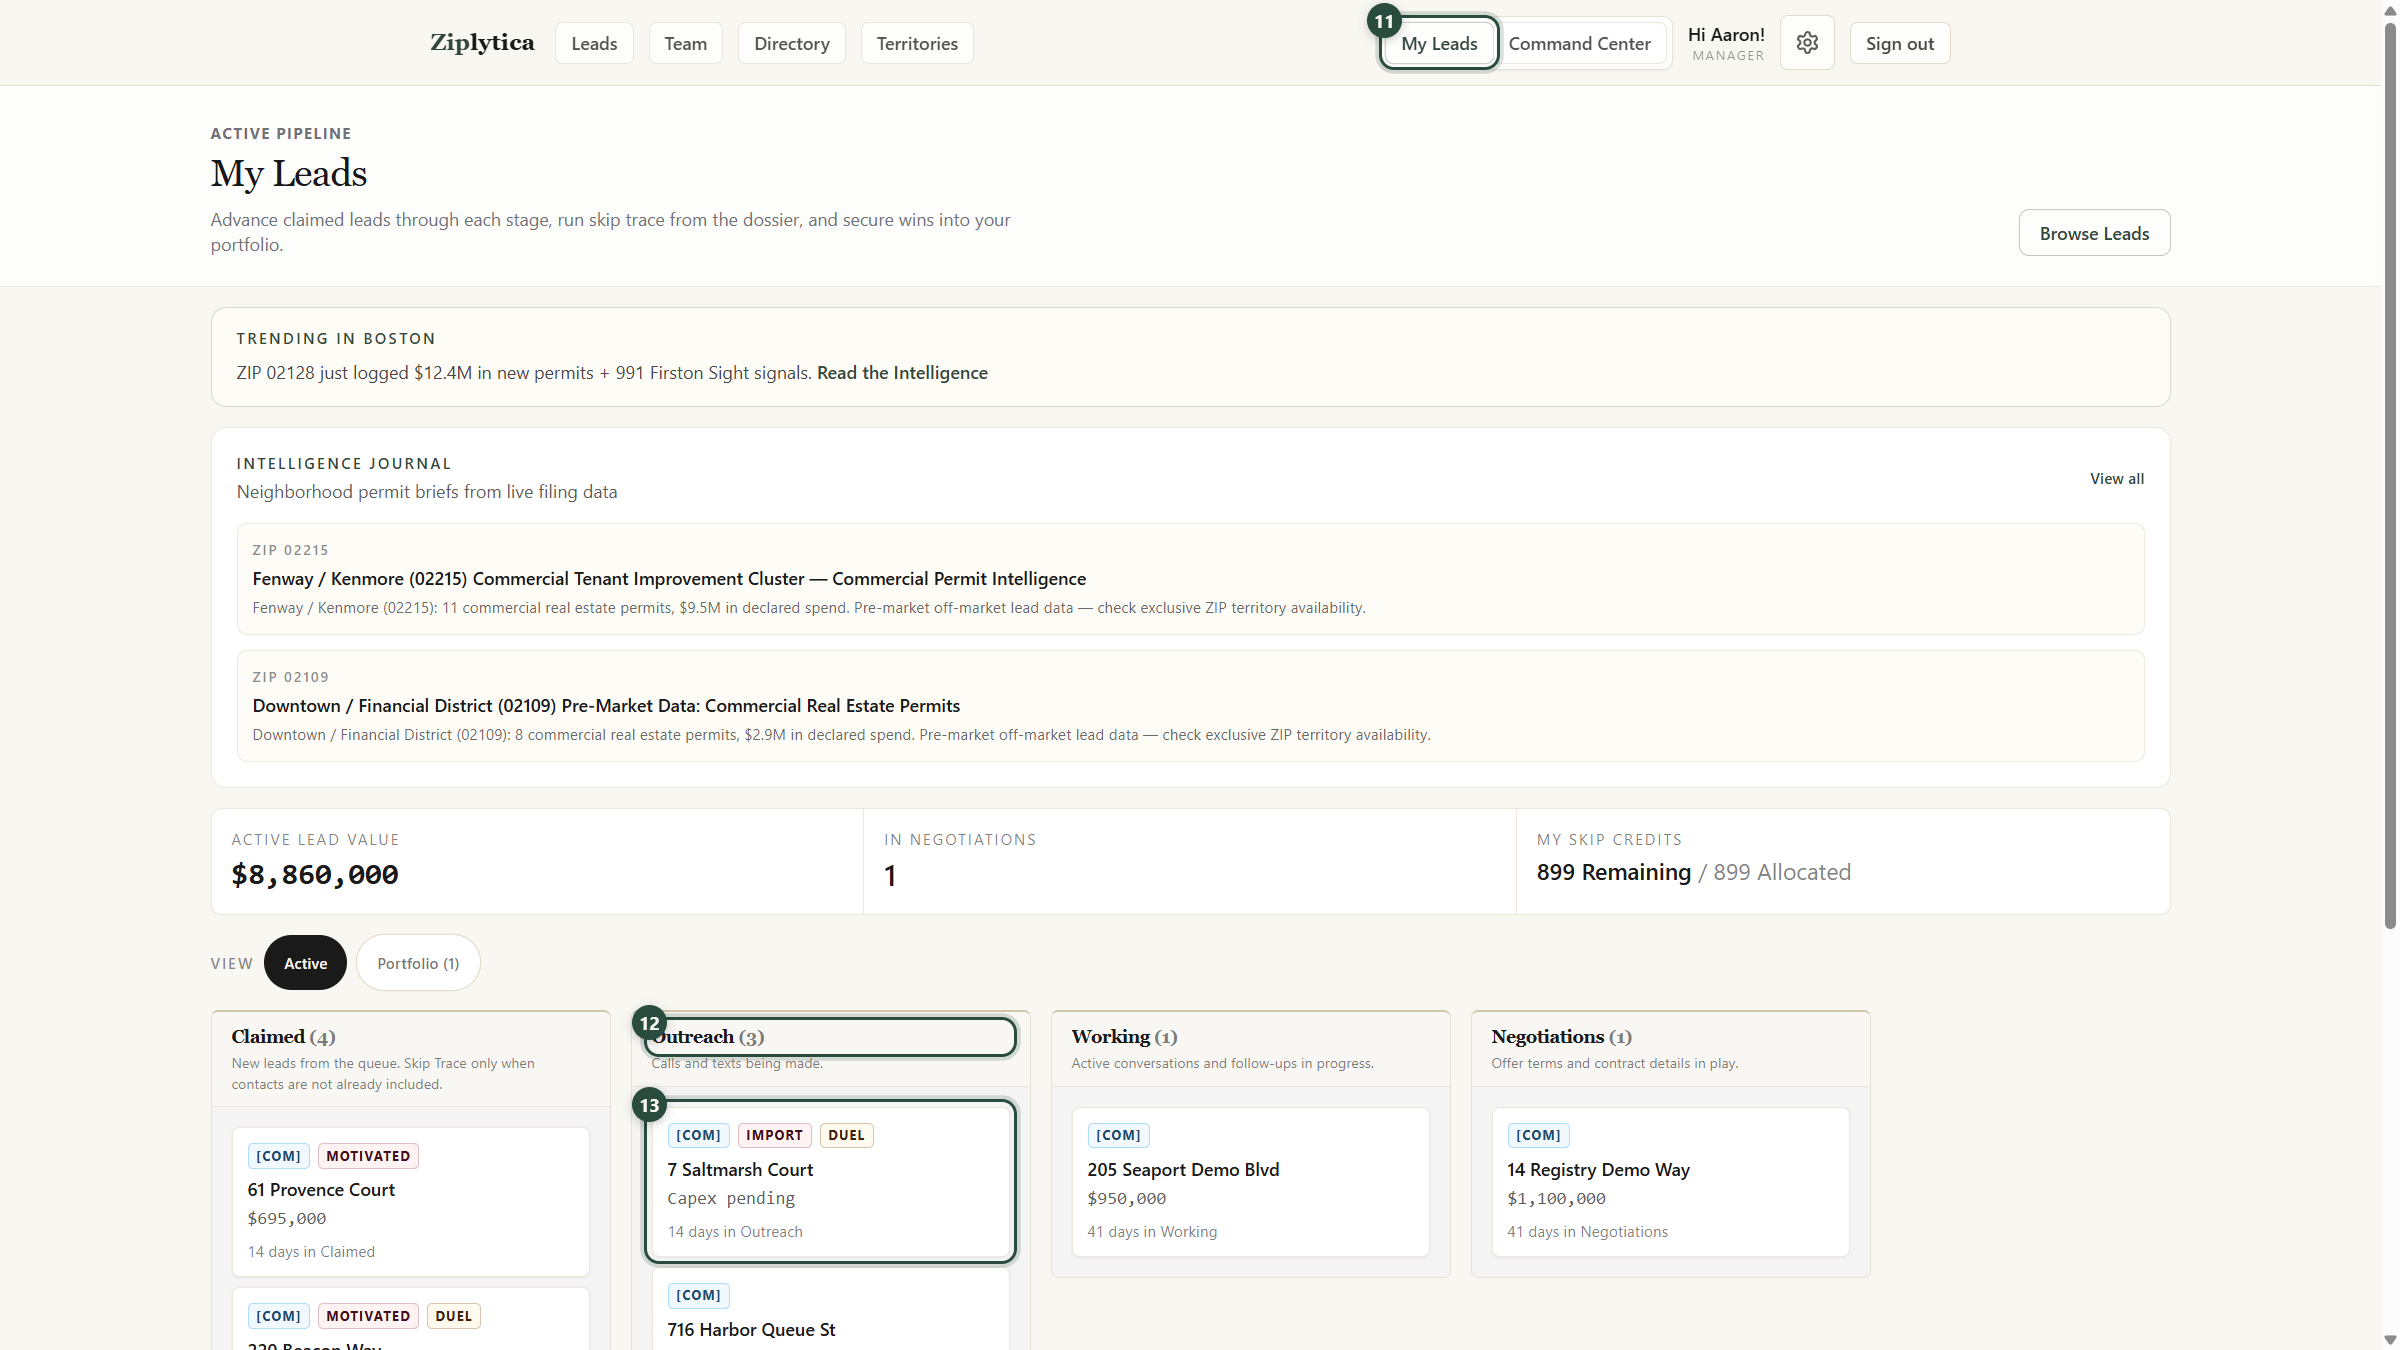
This is the path from Command Center to a postcard or letter. The green numbers mark each step. The pictures are from a sample workspace, so the ZIP codes will look different from yours. Your ZIPs will already be in the list.
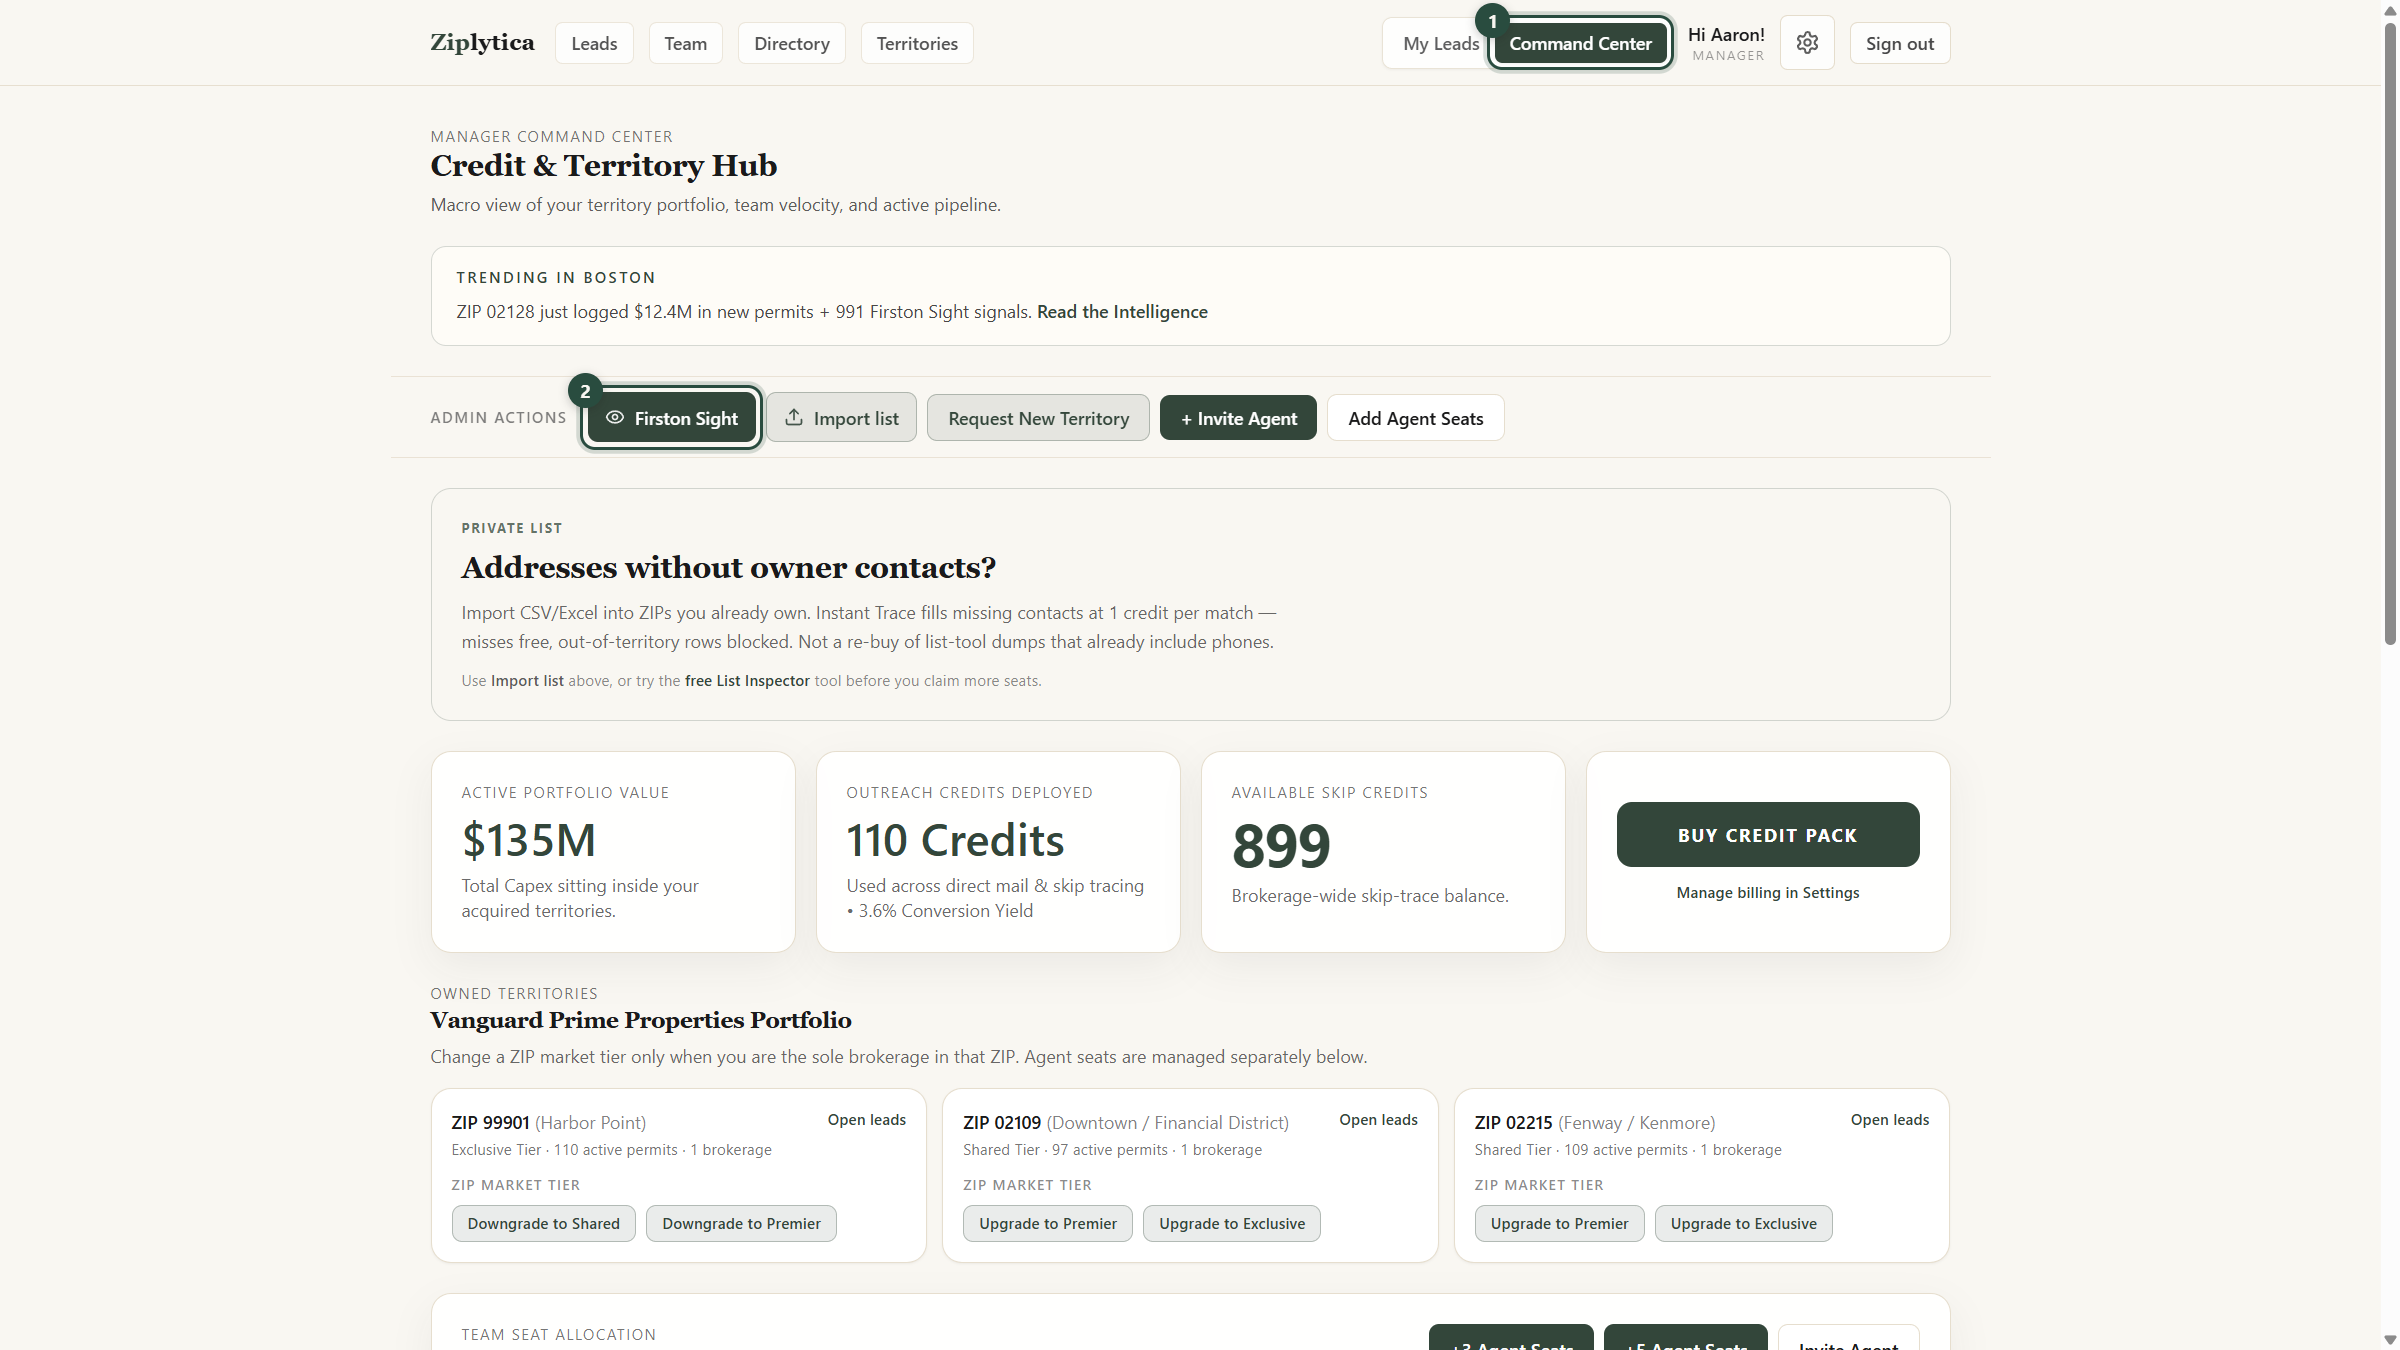
1. Open Command Center, then Firston Sight
Open Command Center (1), then the green Firston Sight button (2). That opens Add to Leads.
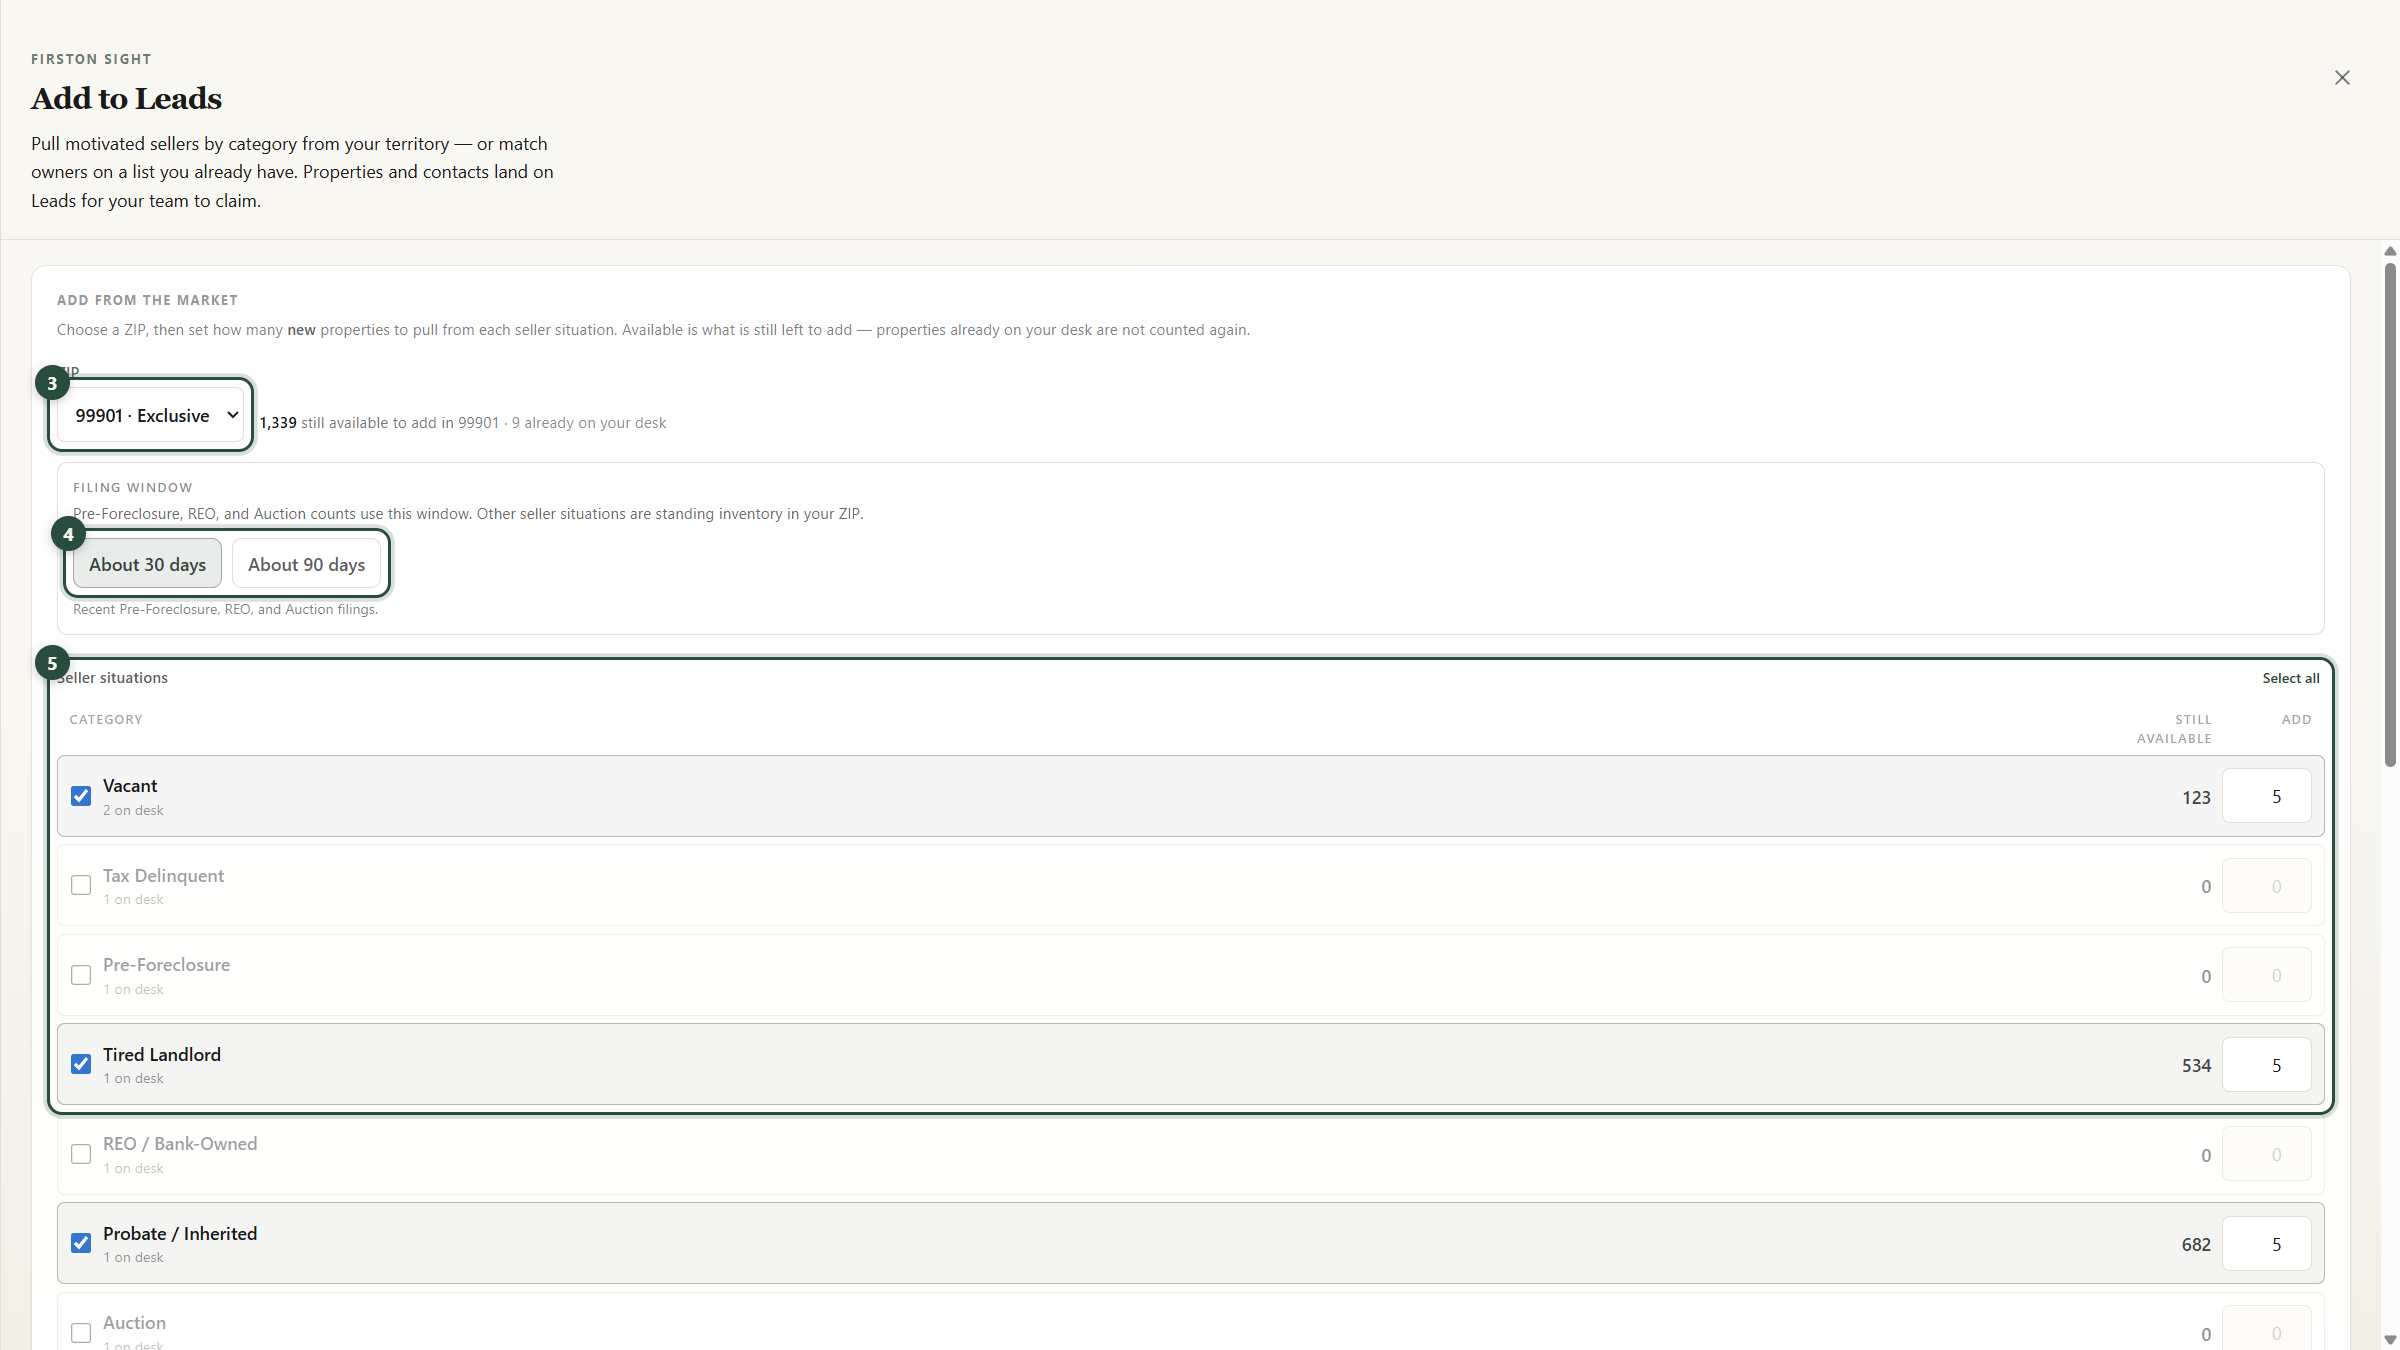
2. Choose a ZIP, how recent, and which seller situations
Pick your ZIP (3). For Pre-Foreclosure, bank-owned, and Auction, choose About 30 days or About 90 days (4). Then check the seller situations you want and how many to add (5). Start with a first batch — you do not need every property in a category.
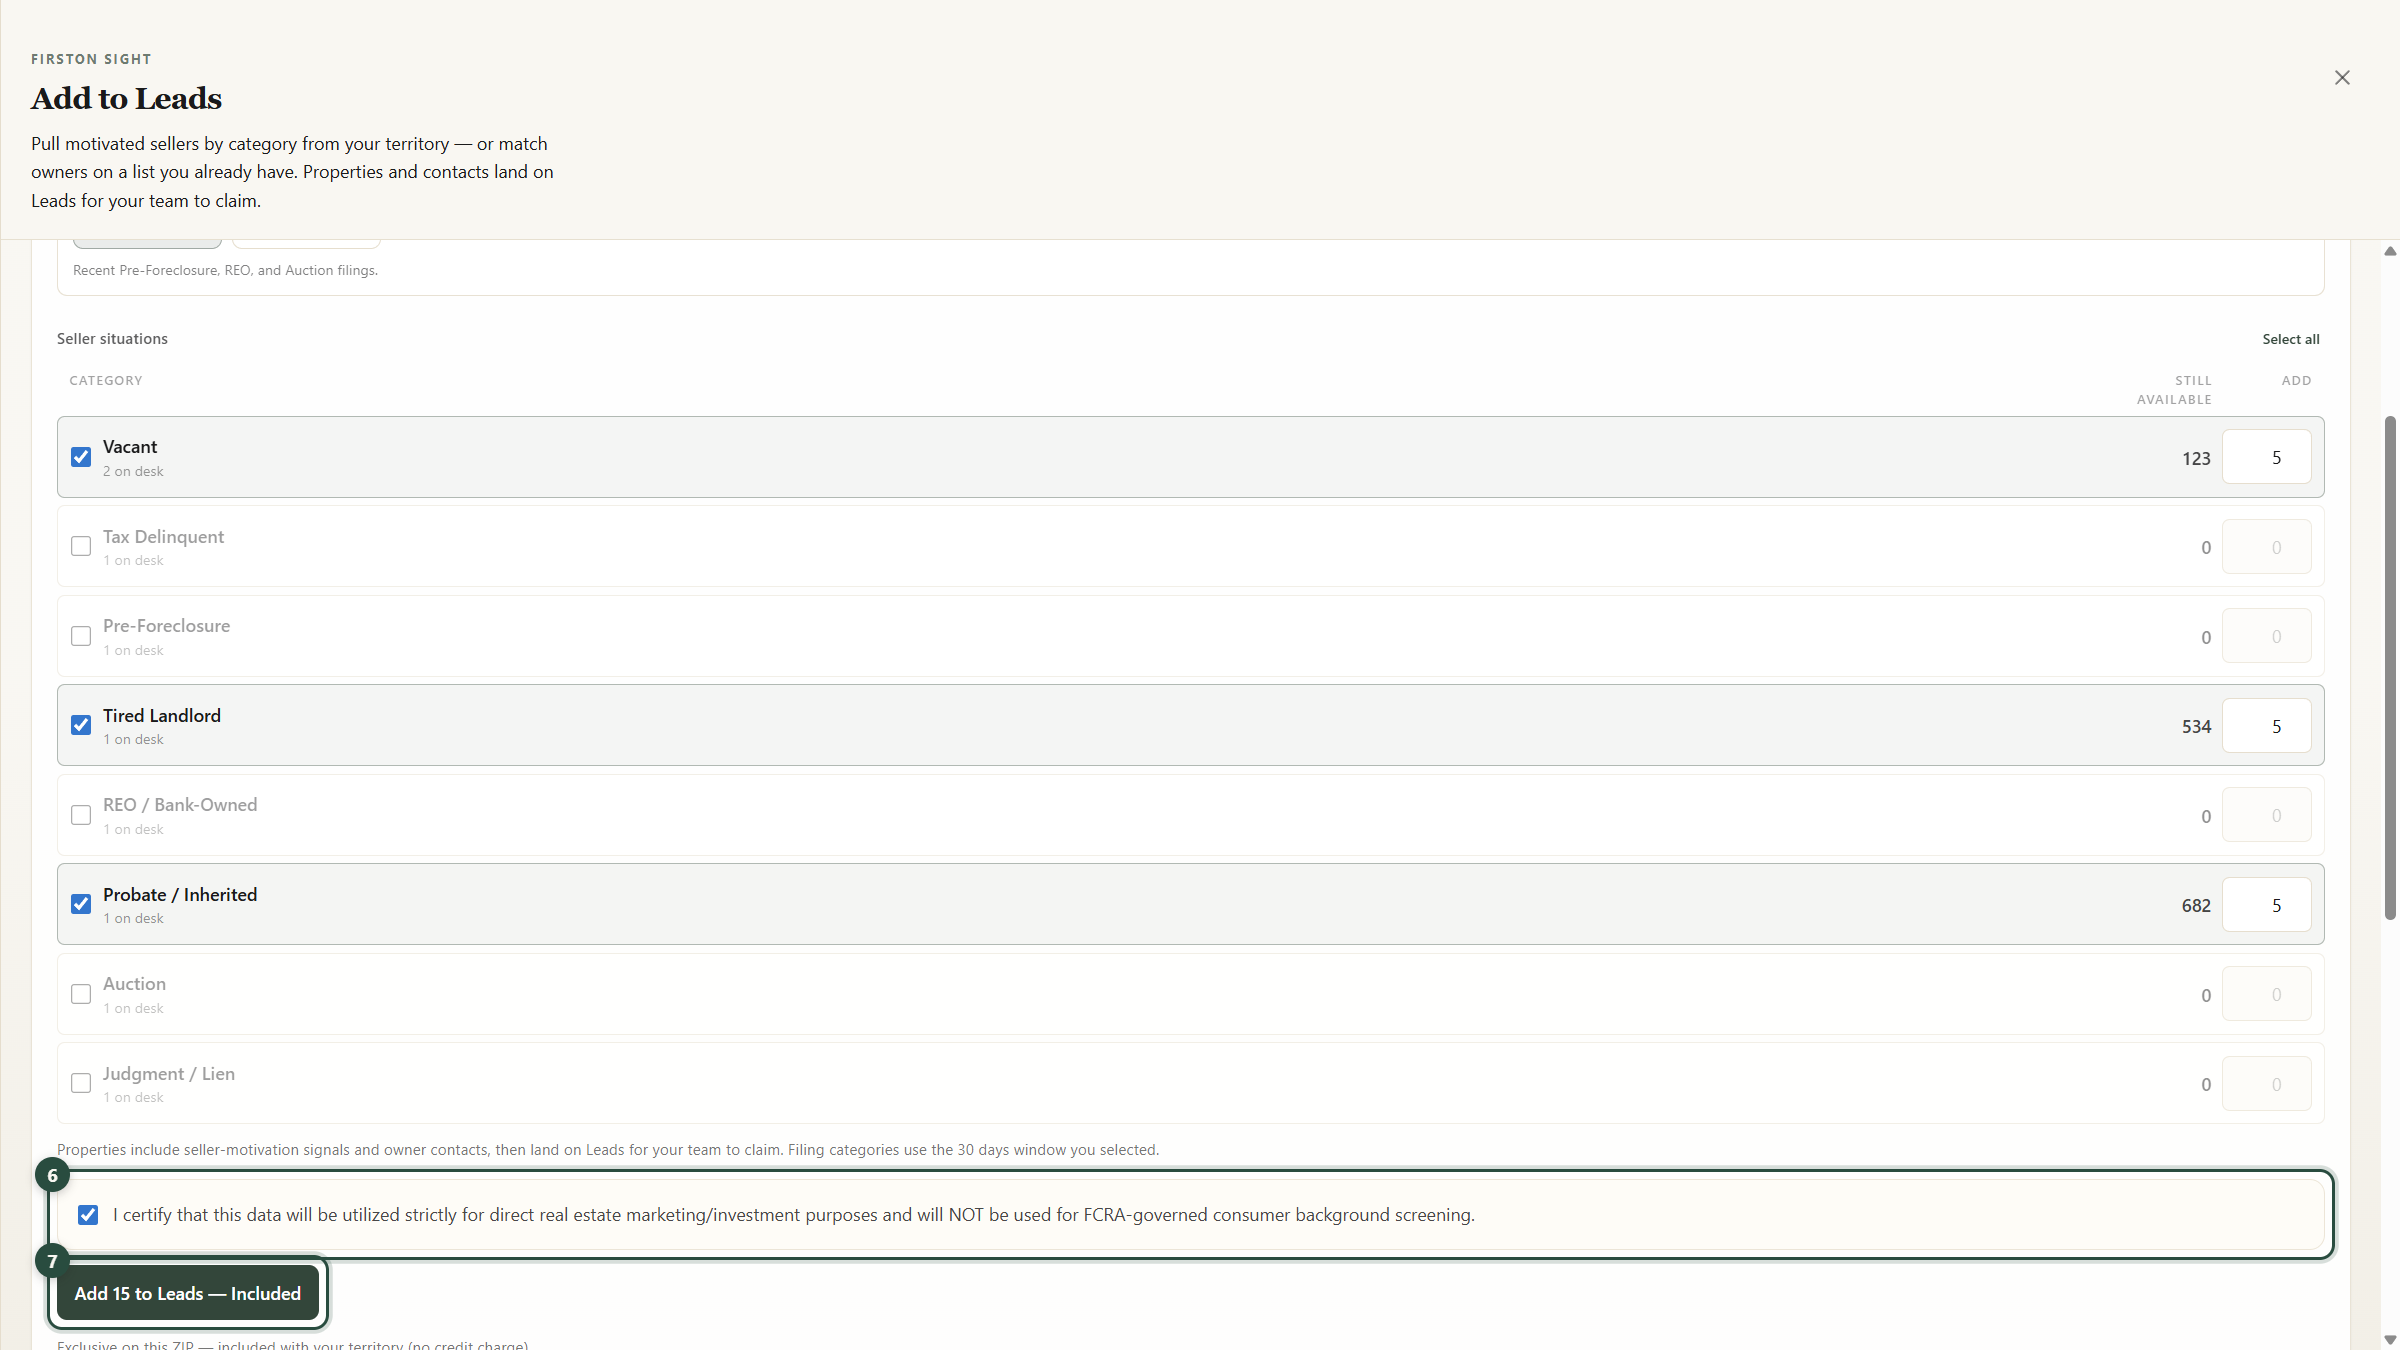
3. Check the box, then add them
Check the box at the bottom (6), then Add to Leads (7). The properties — with owner contacts — show up on Leads for you to claim.
4. Claim them on Leads
Open Leads. If you want a shorter list, use Just added or Firston Sight, then Claim for Self.
5. Work them from My Leads
Claimed properties land on My Leads. Ones with contacts often sit in Outreach — tap a card to open it.
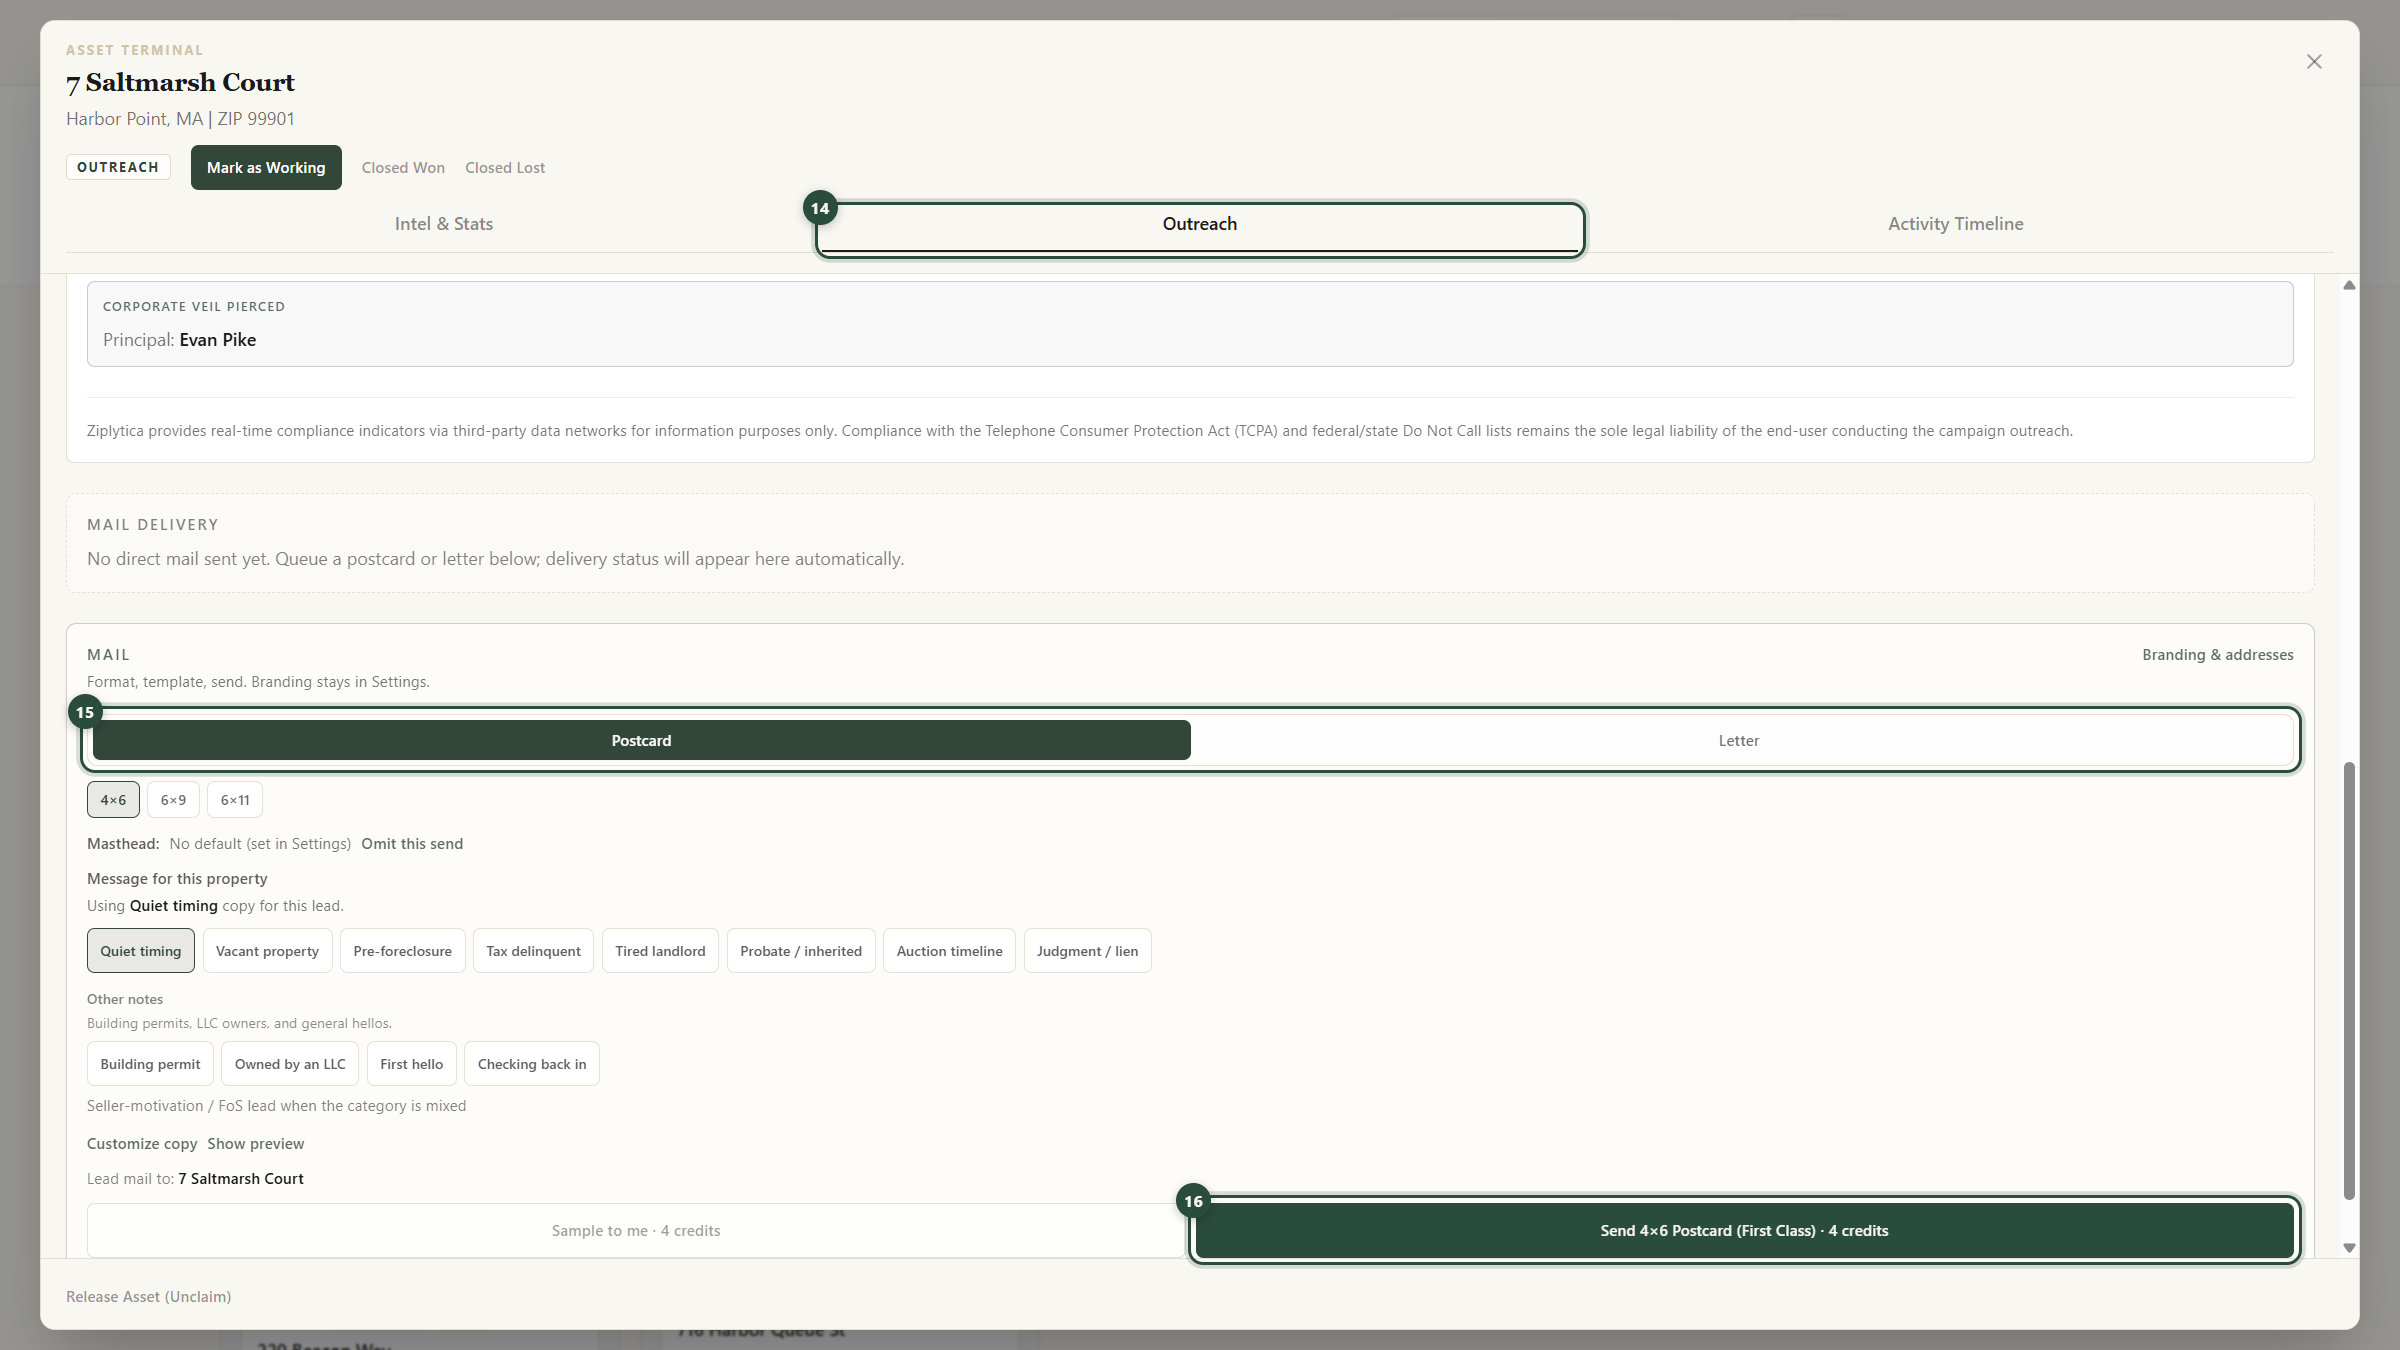
6. Send a postcard or letter
Before the first send, add a return address in Settings → Direct Mail. Then open the Outreach tab (14), choose Postcard or Letter (15), and Send (16).